|
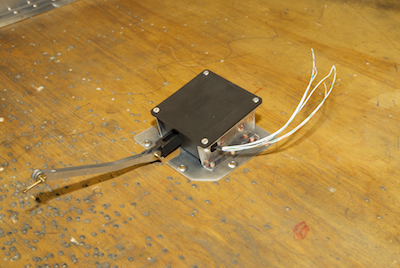
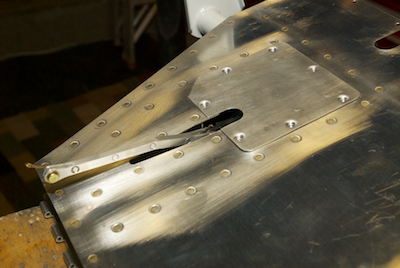
After everything is cured you can move on to riveting the trailing edge together. Before that however there are a couple of assemblies to make. The trim tab servo gets mounted to a removable plate that screws into the doubler seen before. You also rivet together three small pieces of aluminum to make the control arm. One last item I didn’t talk about yet is, just like the rudder, the trailing edge wedge gets two sided tape applied to it. I combined this step with the gluing. The night before, I applied the tape to both sides of the wedges and pulled off the backing on one side and attached the wedge to a skin. It sat for almost a day before I removed the clekoes and set up for installing the foam ribs. After I installed the ribs I pulled the backing off the other side of the wedge as I clamped them together. The tape cured along with the glue on the ribs.
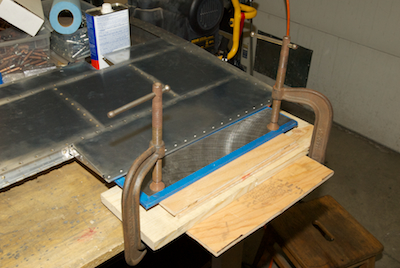
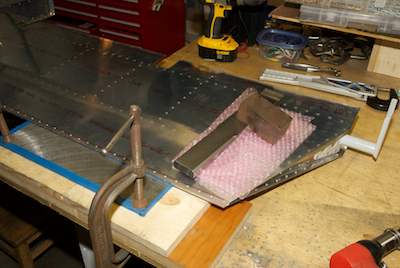
Because of the shape of the trailing edge you have to raise up the back riveting plate so that the underside edge is flat. I clamped it to the table and this setup worked very well. The left elevator trailing edge is very short so it didn’t need to move a lot. The right elevator however did need to move quite a bit. As you get to the end opposite the counterbalance rib it want to fall over. I found that positioning some weights as I moved the elevator kept it nice and flat on the back riveting plate.
|