|
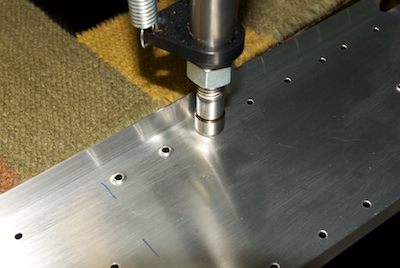
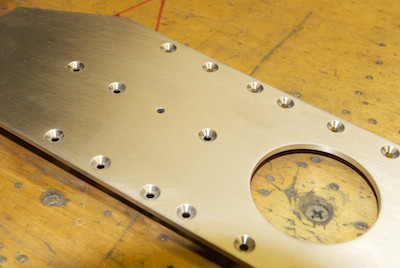
The next steps are the usual boring parts of airplane building. Deburring and edge clean up. Then it is time for dimpling and countersinking. On the Sonex, I dimpled the leading edge skins and ribs. There was also some dimpling and countersinking in the fuselage. This plane however will have a lot more of both as all the exterior rivets on a slipstream surface are flush rivets. Because of the large number of rivets, a new tool comes into play, the C frame dimpler seen in the getting started posts. Picture one shows it in action on the rear spar. These dimples will sit in the countersunk holes in the rear spar doubler shown in picture two.
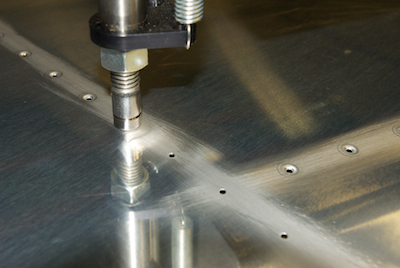
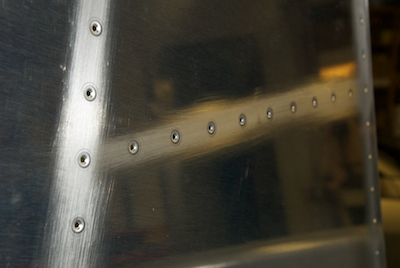
Picture three and four show the dimpling of almost the entire VS skin. If you look close you can see that I have adjusted the C frame dimpler so that the dies are making complete contact around the dimple. The dark ring around the dimple is what you want to see. When I first set it up, you could only see the outer ring so I adjusted it so that more force was applied. The tool works great and does an excellent job - much better than the simple dimple dies I used on the Sonex.
|